
Find My Cutout
Select your door size to see the cutout dimensions, fastener guidance, and installation steps.
Cutout Dimensions
× 5-1/8″H
Cut this opening in your wall or panel.
Outside Panel / Flange
The flange sits flush against the surface around the cutout.
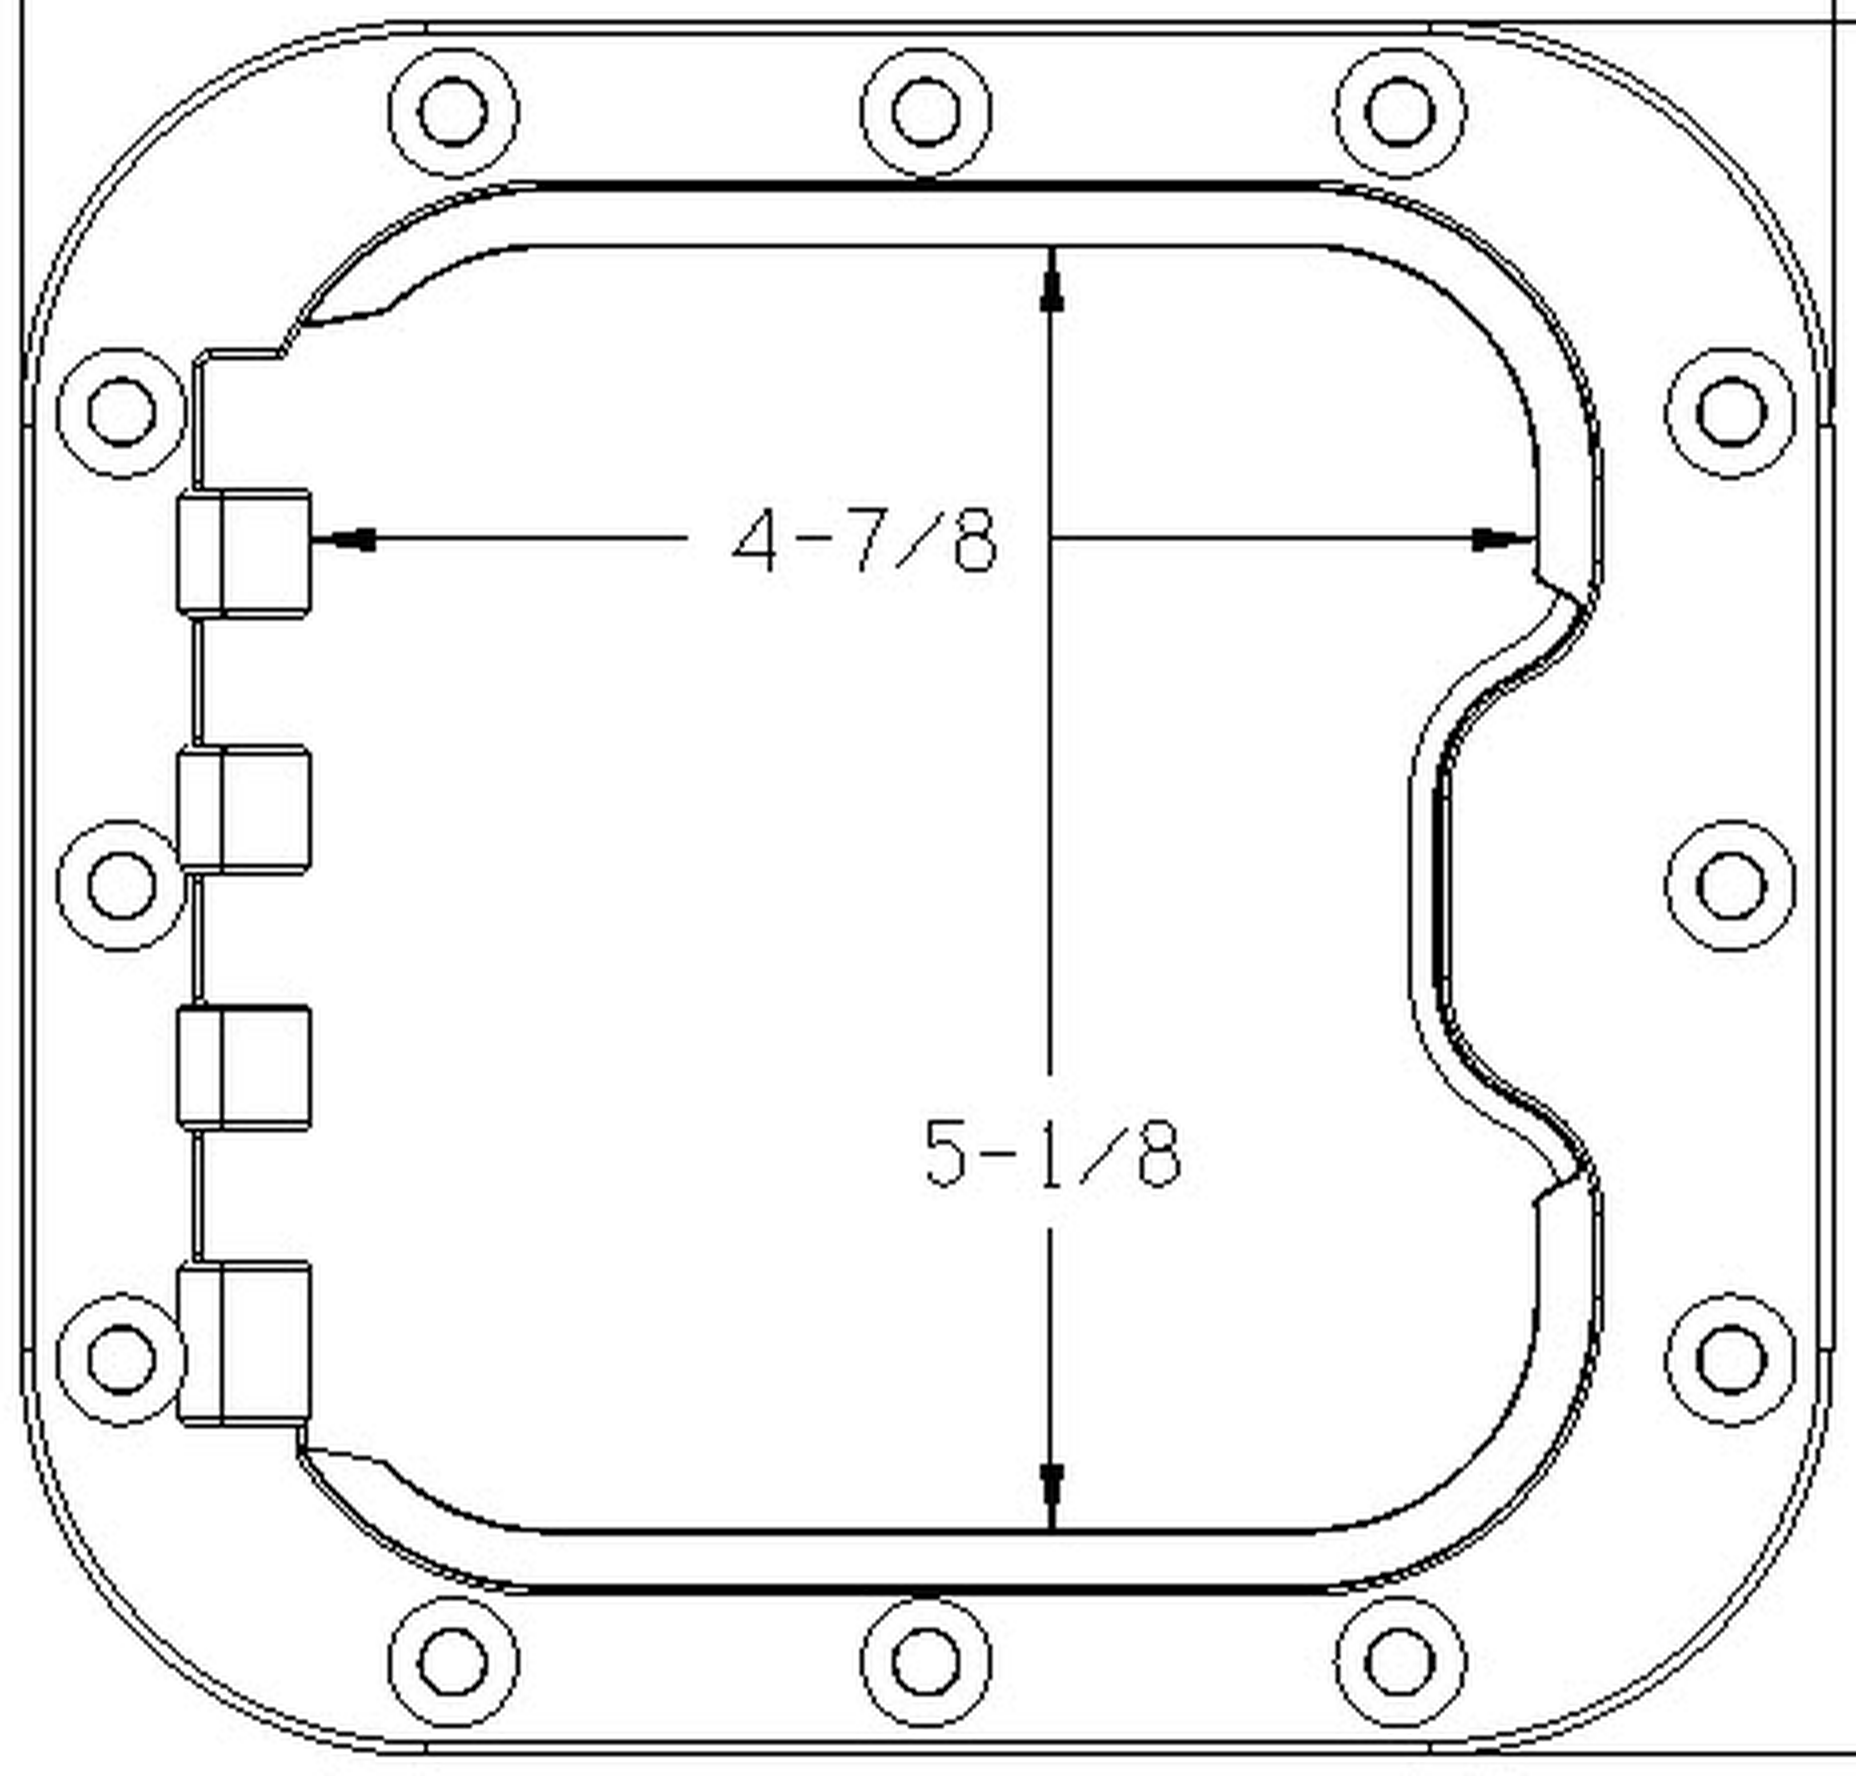
Factory Drawing — Small Door
Bezel 7-1/4″W × 6-7/8″H · opening 4-7/8″W × 5-1/8″H · 12 mounting holes
Fastener Guide by Surface Type
Wood / T1-11 Siding
#8 × 1" stainless steel wood screws
Pre-drill pilot holes to prevent splitting. Apply exterior-grade silicone sealant around the flange before fastening.
Metal Siding / Sheet Metal
#8 × ¾" self-tapping sheet metal screws
Use a step drill or hole saw for the cutout. Deburr all edges. Apply butyl tape or silicone sealant under the flange.
Vinyl Siding
#8 × 1¼" stainless steel wood screws (into sheathing)
Remove the vinyl panel section, cut through the sheathing, and mount the hatch to the sheathing layer. Re-trim vinyl around the flange. Seal with silicone.
Fiberglass / Composite
#8 × 1" stainless steel machine screws with backing washers (or rivnuts)
Use a fine-tooth hole saw or jigsaw with a fine blade. Back-drill with a larger bit to reduce chipping. Seal with flexible marine adhesive sealant.
Installation Steps
Choose the Location
Select a flat, structurally sound area on the wall or panel. Avoid studs, wiring, and plumbing. Check both sides before cutting.
Mark the Cutout
Use the printable cutout template or measure to the exact dimensions. Level and trace the outline with a pencil or marker.
Cut the Opening
Drill a starter hole inside the traced area. Use a jigsaw, oscillating tool, or hole saw to cut along the line. Smooth all edges.
Test-Fit the Hatch
Slide the hatch into the cutout to verify the fit. It should sit flush with the surface. Trim if needed.
Seal & Fasten
Apply sealant around the flange. Insert the hatch and secure with the recommended fasteners for your surface type. Wipe away excess sealant.
Test the Lock
Verify the door opens and closes freely. Test both keys. Your locking hatch is installed.